Detailed Instructions
Step 1: Enter Information in Settings’ sheet
The Settings sheet contains important information elements that the template would use as inputs.
1) Planning Period Start and End Dates
This is the duration in which the template will plan the projects. Maximum allowed period is 366 days.

2) Resources
a. Enter list of resources (up to 30)
b. Enter their regular availability for each weekday.
c. Enter the cost per hour for each of the resource. This will be used in calculating project costs.

Project Planner (Advanced) Excel Template – Settings – Resources
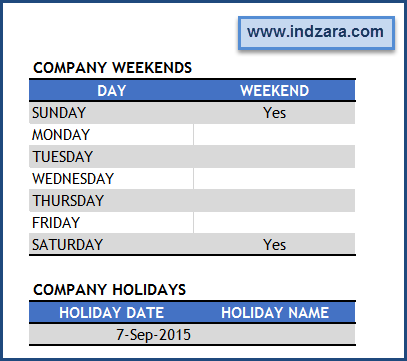
3) Company Weekends and Holidays
a. Choose Yes for weekdays which are usually company’s weekends.
b. Enter the list of Company holidays.
c. Template will not schedule any work during weekends and holidays.
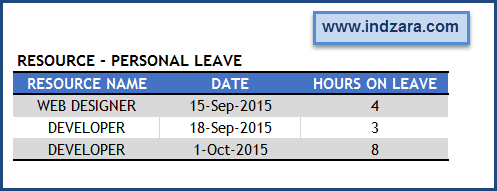
4) Resource – Personal Leave
a. Enter any personal leave each resource will take. Enter hours that the resource will take for leave. This will be used to calculate the availability of resources that will drive the schedule.
Step 2: Enter Projects’ information

- Required
- Enter Project ID and Name. These should be unique and are required
- Enter Project Priority (required).
- Project Priority is used to determine the order of scheduling tasks. 1 represents the highest priority. For example, project with Priority 1 will be given importance and scheduled first before scheduling Project of priority 2.
- If Project Priority is left blank, the project will not be included in plan. If two projects are given equal priority value, the tasks are ordered based on task priority and then the order in which they appear in the TASKS table.
- Optional
- Enter Preferred Start Date (date before which Project should not start)
- If Preferred Start Date is left blank, Planning Period Start Date will be used.
- Enter Preferred End Date (date by which the Project should end)
- If Preferred End Date is left blank, project will be considered completing ‘ontime’ if it is estimated to complete.
- Enter Project Fixed Cost.
- This is the cost other than the resource cost which will be calculated by the template.
- Enter Preferred Start Date (date before which Project should not start)
- Calculated
- Project Plan Status gives instant feedback on whether there are any errors associated with the Project. If there are no errors in data, then it will display ‘Planned’.
Step 3: Enter Tasks’ information
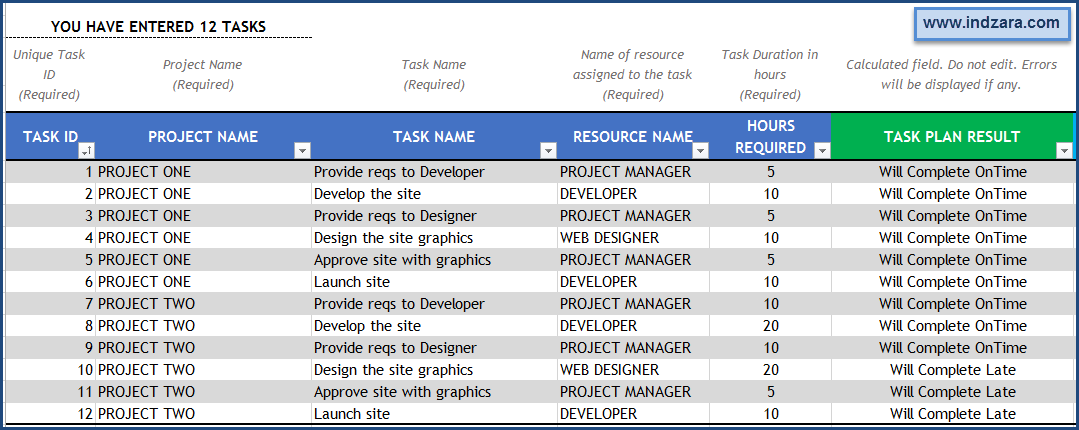
- Required
- Enter Task ID (unique values)
- Enter Project Name (that the task belongs to) and Task Name
- Enter Resource assigned to the task
- Enter Hours Required to complete the task
- Calculated
- Task Plan Result field will display error if there are any. If there are no errors, it will display ‘Will Complete OnTime’ if the task will be completed prior to Task Preferred End Date and ‘Will Complete Late’ otherwise. It will display ‘Will Not Complete’ if the task cannot be completed.
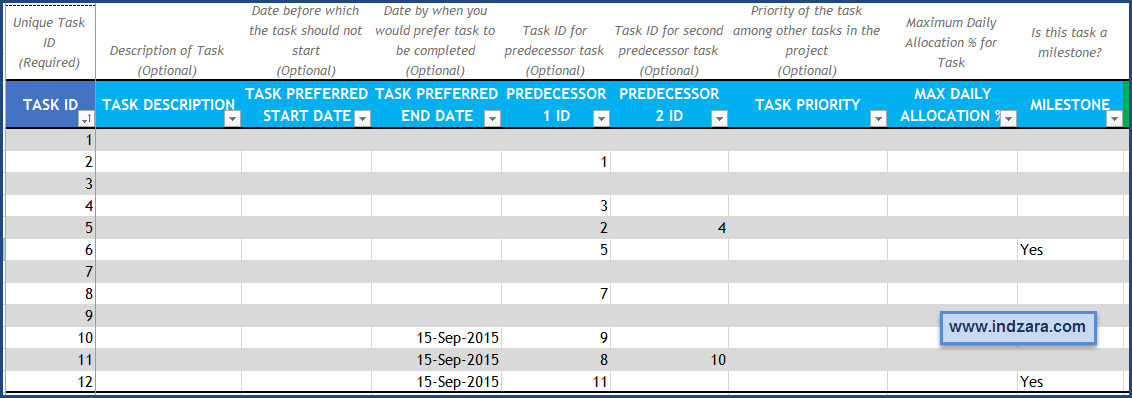
- Optional
- Task Preferred Start Date can be used to indicate if a task cannot begin until a certain date.
- Task Preferred End Date can be used to indicate if a task should end by a certain date. This is used to flag whether a task completes on time or late.
- Up to 2 predecessors can be assigned to a task. When a predecessor is assigned, the task can be started only the day after the predecessor has been completed. Similarly when 2 predecessors are assigned, the task can begin only the day after both predecessors are completed.
- Task priority is provided so that you can control which task gets done first if the same resource is assigned to multiple tasks within the same project.
- If task priority is not provided, all such tasks in the project will be prioritized based on the order in which they are entered in the table.
- Max Daily Allocation % is the % of a resource’s time every day that the task should be limited to. For example, if a resource is available for 8 hrs on a day and you had set 50% max daily allocation, then the template will only schedule the resource up to 4 hrs for that task. This allows a resource to work on multiple tasks in parallel.
- Milestone: Leave it blank if a task is not a milestone. Otherwise, choose Yes. This will be displayed on the Gantt chart.
- Calculated
- Overall Priority will show ‘ERROR’ if required fields are not populated. Tasks that have errors will not be included in plan. Lowest number means the highest priority.
With this step, the data entry in this template is complete. All the following sheets will be automatically created.
Step 4: PLAN Summary
Projects’ Summary:

- Summary of each project’s key metrics and attributes
- Projects that will not complete will be highlighted.
Projects – Timeline view
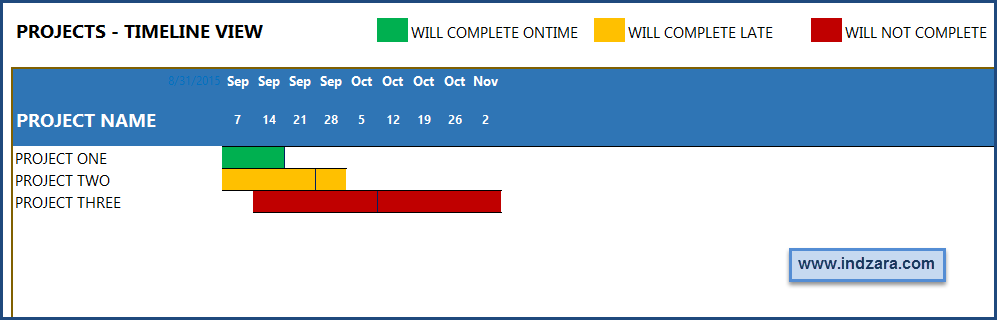
- Visual representation of the projects’ timeline (weekly).
- It also highlights whether the project will complete on time, late or will not complete.
- The blue vertical line indicates the Preferred End Date of projects.
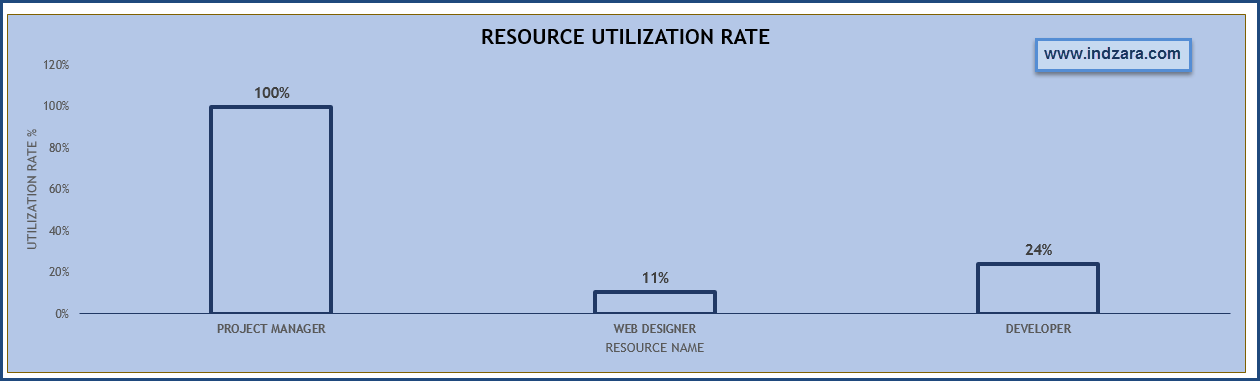
Resource Summary
Summary of statistics for each resource
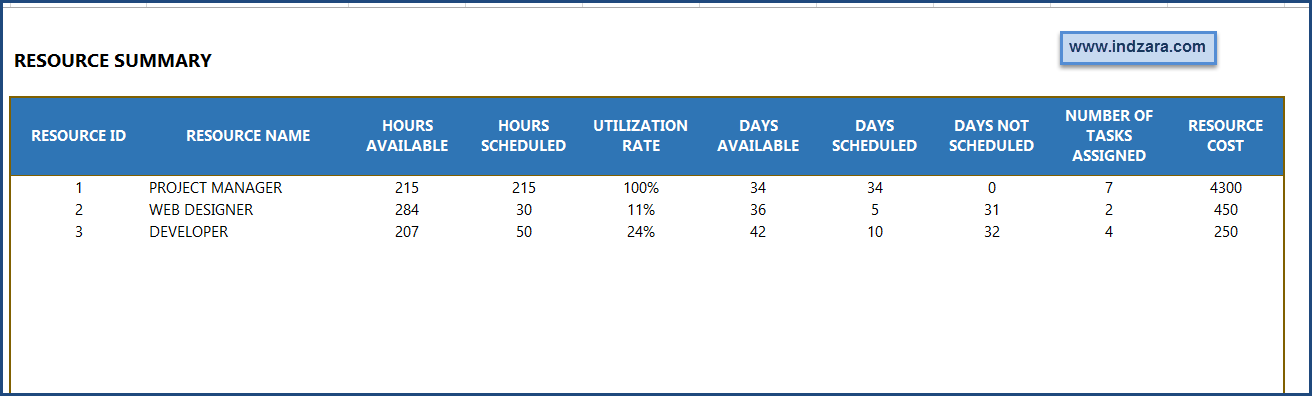
Resource Utilization Rate of each resource
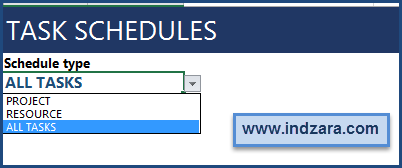
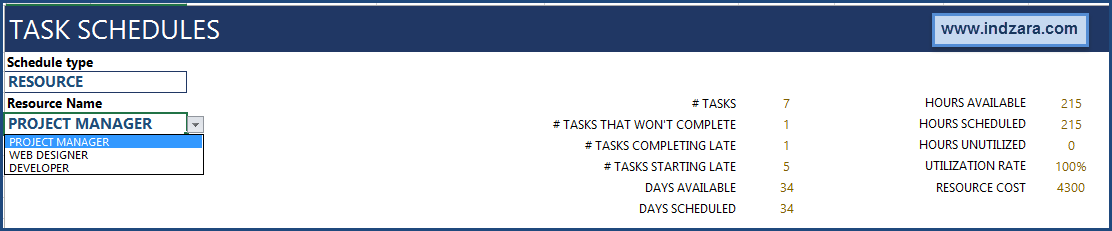
5. Task Schedules
This sheet provides the schedules (Gantt charts) that are customizable. First, you can choose from three different schedule types. (Project, Resource or All Tasks). By default, All Tasks will be shown.
You can choose PROJECT and choose one of the Projects. You will now see three things.
1) Project Summary at the top with key statistics
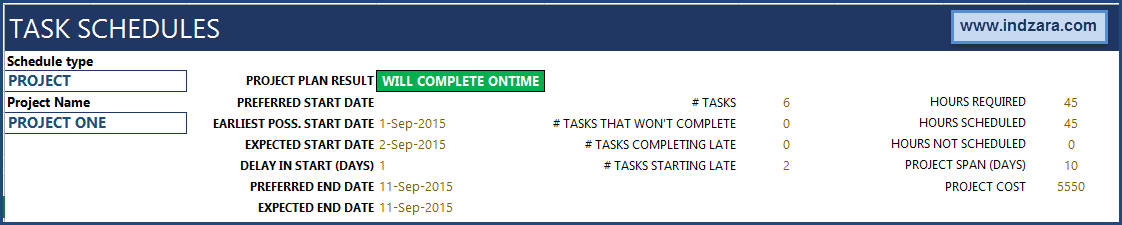
2) Tasks with their details. 50 tasks are shown at a time.

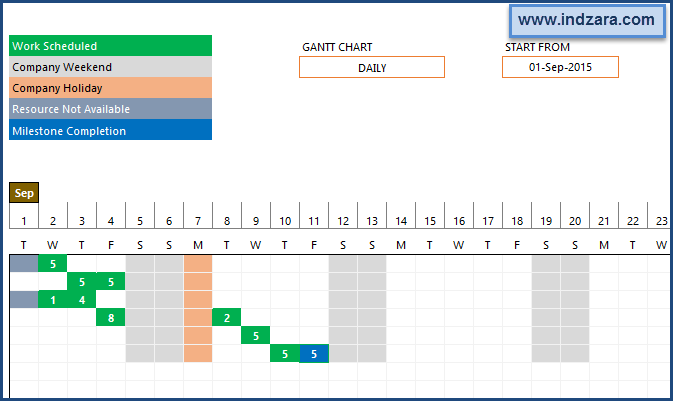
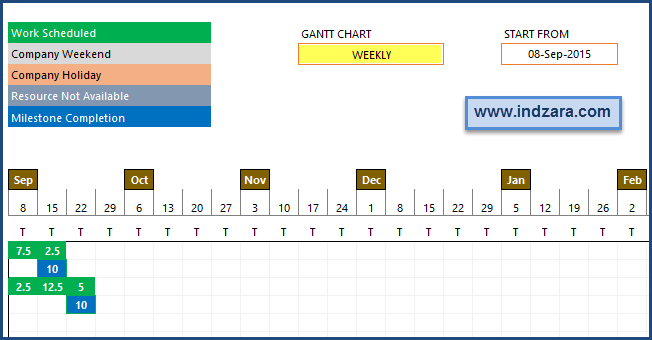
3) Gantt Chart
In order to see schedule for a specific resource, you can choose the resource schedule type.
Tasks that will complete late will be labelled as orange background and those that will not complete will be shown in red.

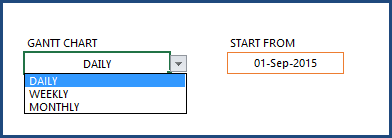
Gantt chart can be customized by entering any start date and choosing from Daily/Weekly/Monthly. You can also change the start date of the Gantt chart.

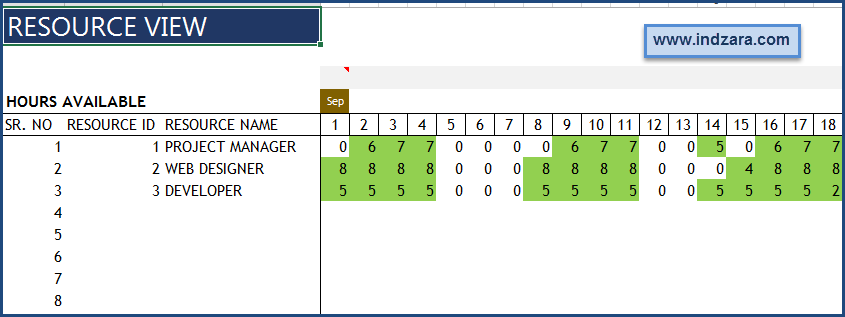
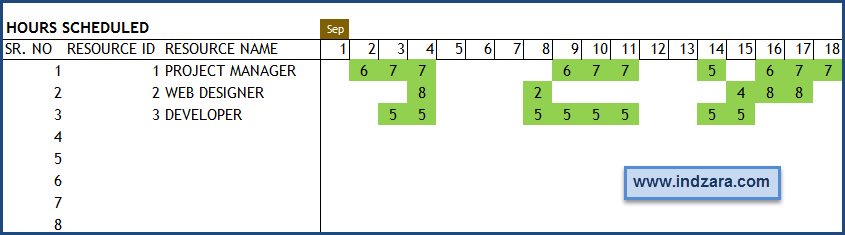
Step 6: Resource View
The ‘Resource View’ sheet displays the hours available for each resource for each day and the hours they have been scheduled.