Step by Step Instructions
Enter Invoice data in Invoices sheet

The fields required are
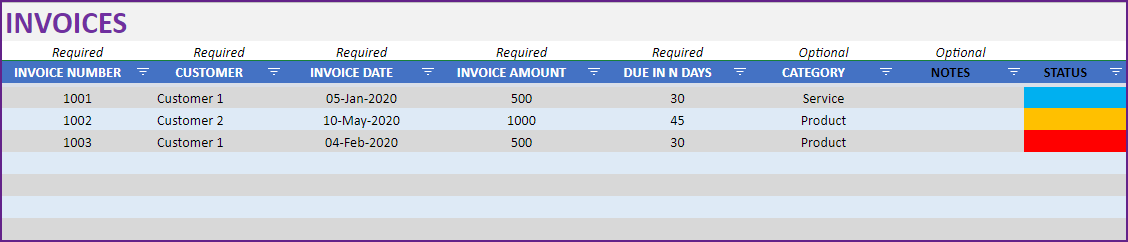
- Invoice Number: Unique identification of invoices. The Invoice number should not be repeated.
- You can have any method to come up with invoice numbers. For example, you can start with invoice number 10001 and then each new invoice, increment by 1. 10001, 10002, 10003, etc.
- Customer: Name of the customer to whom the invoice was sent to. It is important to be consistent with the customer name. When payments are made by customer, we will be entering them based on Customer Name and thus being accurate and consistent with Customer Name is important.
- Invoice Date: Date of issue of Invoice
- Invoice Amount: Total amount on the invoice that Customer needs to pay
- Due in N Days: Type 30 for the due date of invoice in 30 days after Invoice Date. For example, an invoice issued on Jan 1st will become due on Jan 31st, if you put 30 in the DUE IN N DAYS column. Depending on the period for each invoice, you can type the appropriate number.
- Category: This field is provided so that you can categorize the different invoices. For example, if you are providing two types of service and you want to be able to track them separately, you can categorize the invoices accordingly. Only one category is chosen for each invoice. This will be used in the Dashboard later.
- Notes: Optional field where you can type in any comments or notes about the invoice.
- Status: This is an automated field which will change color based on the status of the invoice.

The four status values possible are
- PAID IN FULL: If Invoice has been paid in full by payments made by customer
- OVERPAID: if paid amount Is greater than invoice amount
- CURRENT: If it is not paid yet, but the due date is in future – in other words, not due yet.
- PAST DUE: If it is not paid and the due date has passed.
Now, let’s enter our first invoice data.
Important: Start by typing in cell A4.
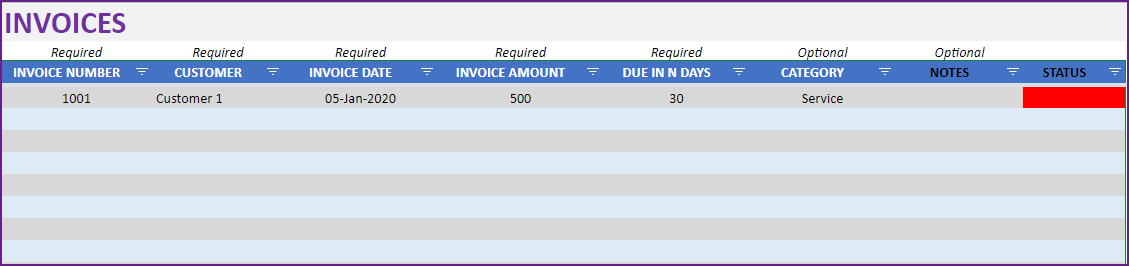
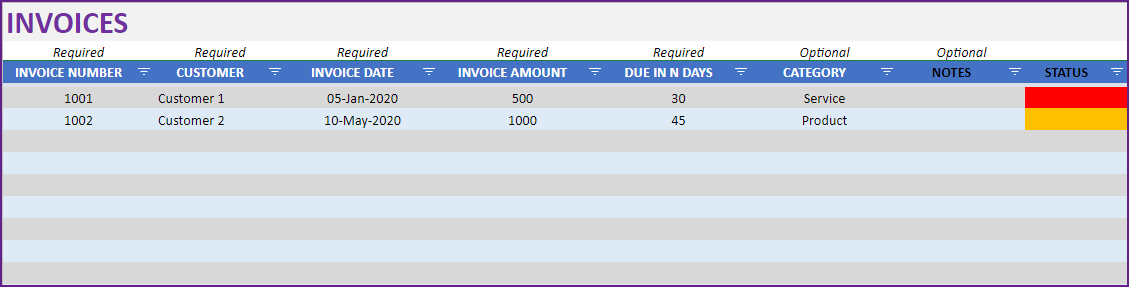
In the above example, I have entered an invoice dated 5th Jan 2020 for an amount of 350 due in 60 days after invoice. Today is April 13th (as of writing this tutorial) and as of today, the invoice is past due date and we have not entered any payment yet for this invoice. Hence the status is Red in color.
To enter a second invoice, you would enter a new invoice number in cell A5.
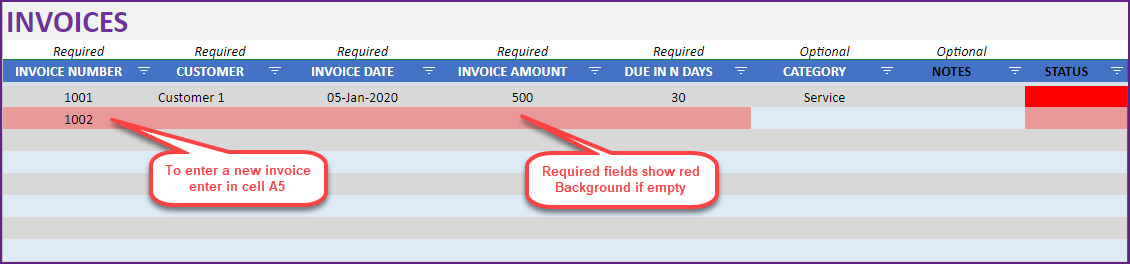
The fields that are required will have a red border if left empty. This serves as a visual reminder to enter those values.
To enter third invoice, you will enter a new invoice number in cell A6.
Pasting Data from Another Source
If you are pasting invoice numbers or data from another spreadsheet, please take extra care in pasting.
- Ensure the order of columns of data you are pasting align with the columns in this table. For example, please do not paste Invoice number in Invoice Amount column. The columns cannot be altered like that.
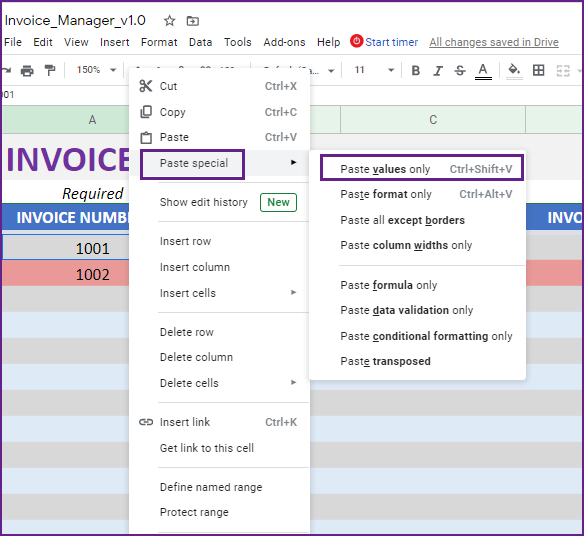
- When pasting please paste as values. Do not paste the data with Ctrl+V or paste default.
- Right click on cell A4 and choose Paste Special as shown below.
After entering my second invoice, it looks like this.
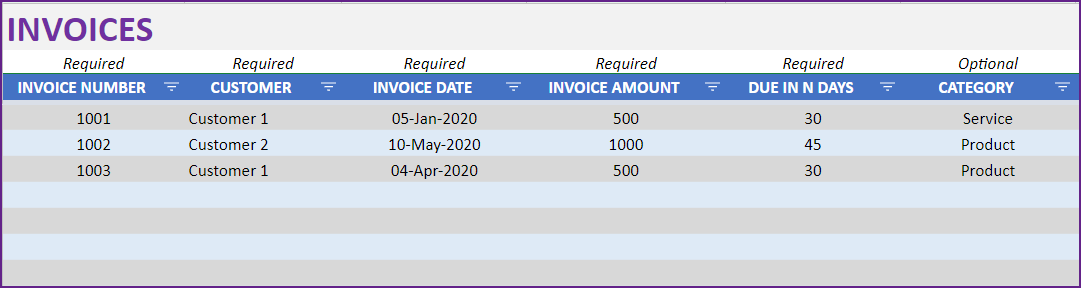
After third invoice, it will look like this.
You can continue to enter up to 5000 invoices like this in the sheet. It is easy to extend even beyond that. The Google Sheet file may become large and you may prefer to start over for the next 5000 invoices.
Entering payments
In the Payments sheet, we will enter payments made by customers in the table. The steps and guidelines for data entry are like the ones we followed in Invoices sheet. So, we will focus here on types of payments.
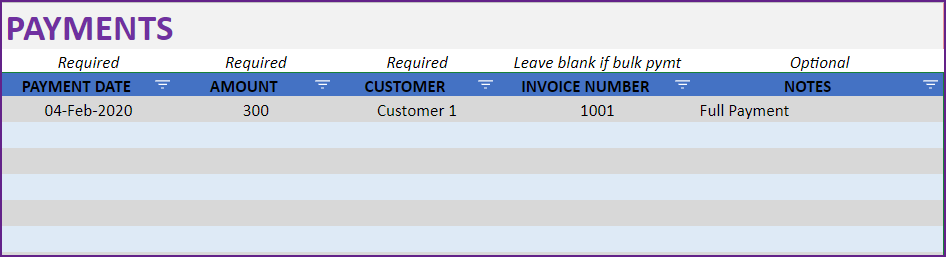
Full Payments
If the customer chooses to pay the invoice amount in full, with one single payment, the data could be entered as shown below.
Multiple payments (Partial payments)
As an example, I have entered 2 payments as shown below.
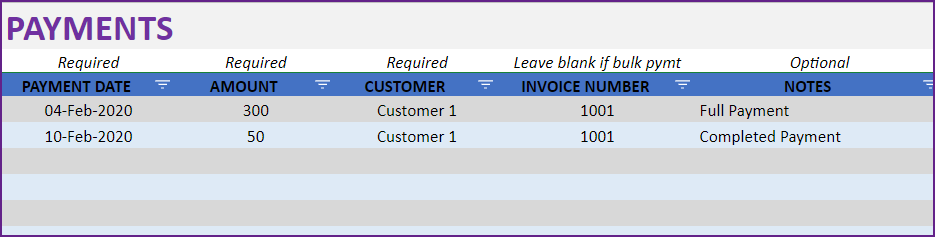
In this case, Customer ‘First Customer’ made payment of 300 on 4th Feb and remaining 50 on 10th Feb. Both were for same invoice# 1001.
Bulk Payments
Sometimes, customer may make payments across two invoices. They are referred to as Bulk Payments in this template.
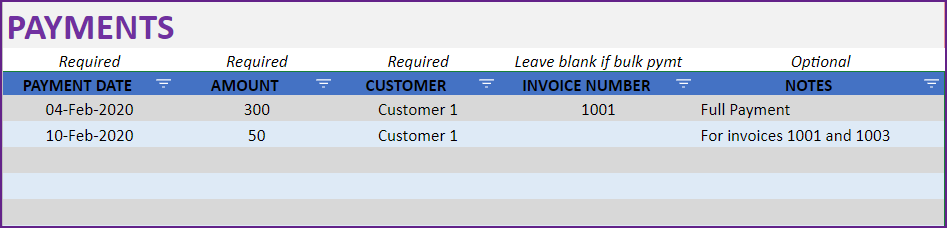
Let’s take the same ‘First Customer’. Instead of making the 50 remaining balance on Invoice # 1001, let us assume the customer made a payment of 100 as shown below.
In this case, we don’t enter an Invoice number in the Invoice number column. That’s because it is a bulk payment – a payment that goes against more than one invoice. Here, the payment of 100 should be used against invoices 1001 and 1003.
Bulk Payment vs Invoice Payments
The template will automatically apply the bulk payment against open invoices using a ‘first in first out’ rule. Whichever invoice (for the specific customer) appears first in the Invoices sheet will be closed out before applying against the invoice that appears next. The order of entry in the Invoices sheet dictate the payment distribution.
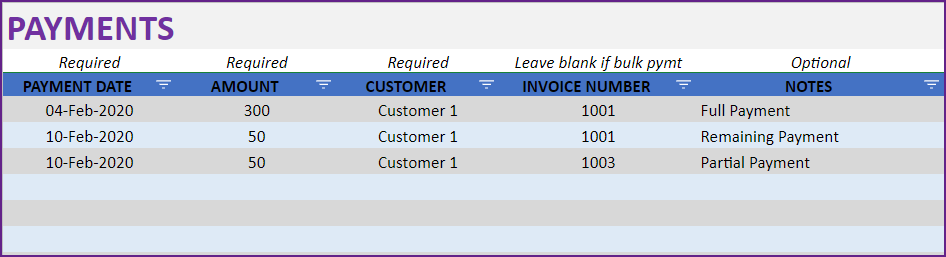
If you need to specifically control which invoices the payment should be applied against, then enter them as invoice payments instead of bulk payments. For example, the same payment of 100 can be split to two invoice payments of 50 as shown below.
Invoice Overpayment
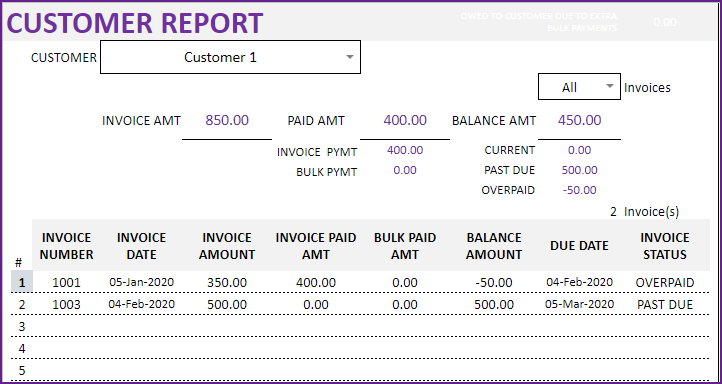
If the customer makes a payment greater than the invoice amount, it will appear as Overpayment in status.
In this case, the payment was 400 was made for invoice # 1001.
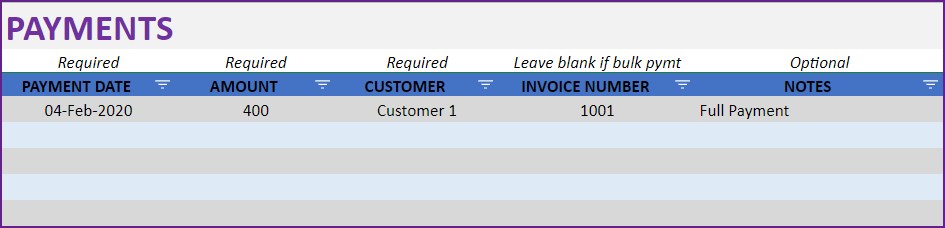
Since the invoice amount was only 350, the status is blue in color indicating overpayment.
The additional amount of 50 will not be used to pay off other invoices.
It will be listed as overpaid in the customer report.
It is recommended that you update the Payments table to reflect as shown below. 350 for invoice #1001 and 50 as bulk payment.

This would ensure that there is no overpayment for the customer in the report.

Overpayment of Bulk Payments
In the above case, the customer had another invoice to which the bulk payment was applied. What if the customer didn’t have another open invoice?
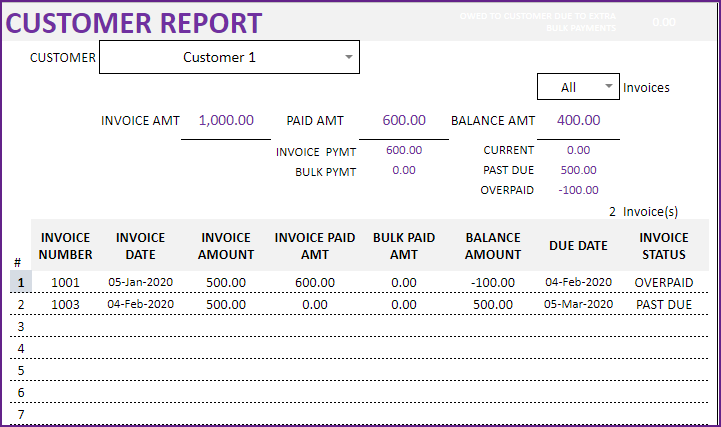
In such cases, the customer report will show the extra amount in the top right section as shown below.
This is the amount you will owe to the customer, since the customer has made extra amount as payment. If a new invoice is issued to customer, then this extra bulk payment amount will be used to pay off the new invoice.
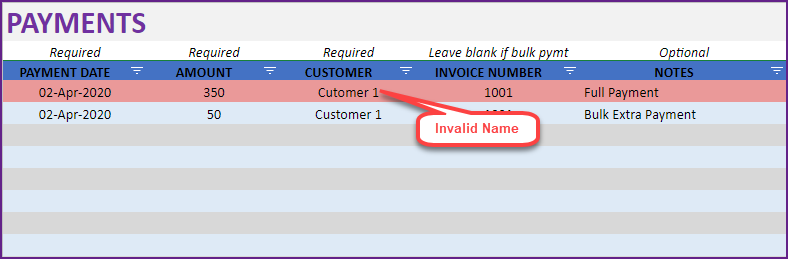
Customer Name validation
If the Customer Name entered for an invoice payment does not match the name in the Invoices sheet, a red border will appear on the payment record.
Refresh Calculations
The template automatically refreshes after entering invoice or payment data.
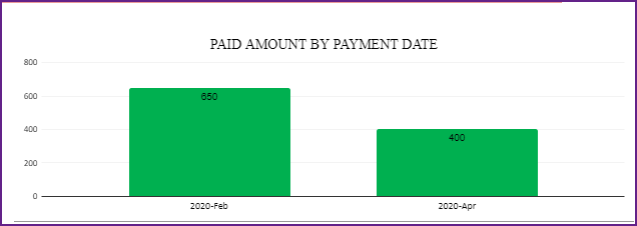
In the Payments sheet, you will see a Payment trend by Month.
Dashboard
In the Dashboard sheet also, the data gets refreshed due to us refreshing in previous step.
The dashboard is designed to give you insights about customers and revenue for your business.
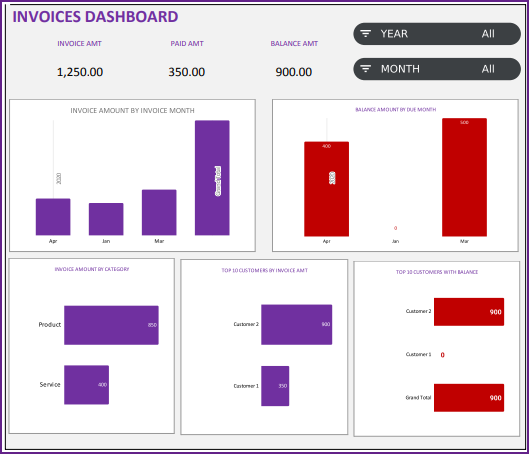
The dashboard shows the following visuals:
- Invoice Amount by Invoice Month – Displays revenue trend
- Balance Amount by Due Month – Displays when balance amount will be due (future revenue projection)
- Invoice Amount by Invoice Category – Identifies categories that bring most revenue to your business
- Top 10 Customers by Invoice Amount – Customers that bring most revenue to your business.
- Top 10 Customers by Balance Amount – Customers who owe the most to your business now
The dashboard can be filtered by Invoice Date slicer.
Unpaid Invoices Report
The report shows all unpaid invoices – broken down into Current and Past Due invoices. You can use this report as one place to see all invoices past due and take necessary actions to follow up with those customers.
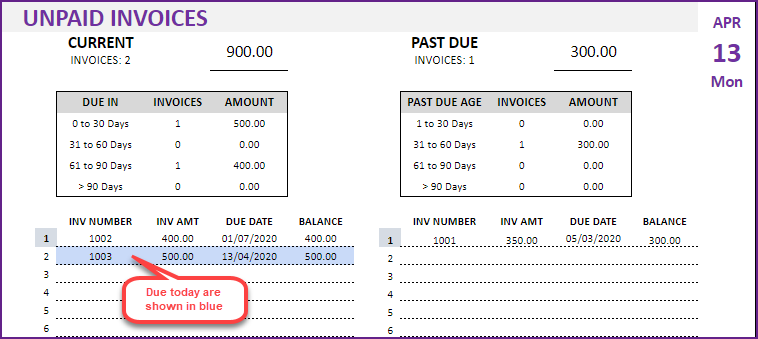
- It gets updated automatically as soon as you enter/update data in Invoices and Payments sheets.
- The Aging of invoices
- For Current Invoices: Number of days from today to Due Date
- 0 to 30 days, 31 to 60 days, 61 to 90 days and > 90 days
- For Past Due Invoices: Number of days from Due Date to Today
- 1 to 30 days, 31 to 60 days, 61 to 90 days and > 90 days
- For Current Invoices: Number of days from today to Due Date
Customer Report
Customer Report is designed to be a one page view of all invoices for a customer.
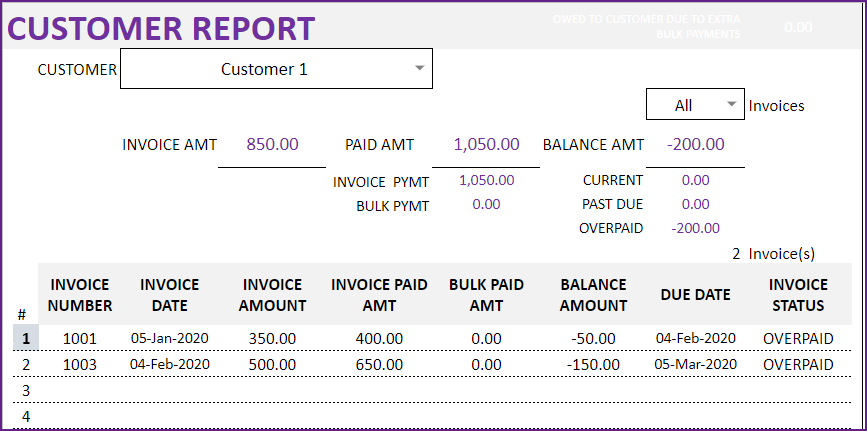
You can type a Customer name in the customer input field at the top left.
The first section shows the total invoice amount, paid amount and balance amount.
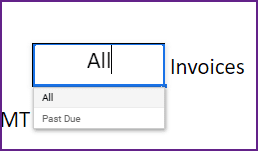
You can choose to see all invoices or only past due.