In this blog post, we will learn how to create a check box form control in Excel, use it to receive user input and store it in a cell.
A sample implementation is below.
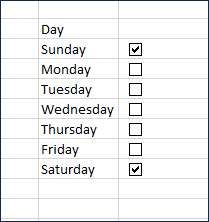
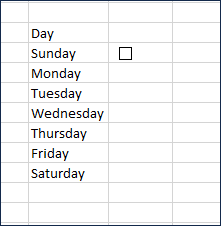
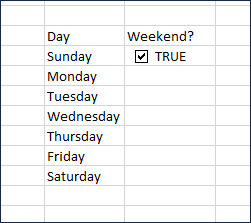
We want to allow the user to choose the days that are weekend days.
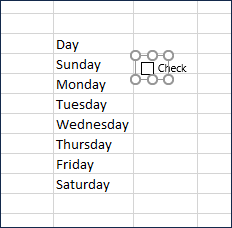
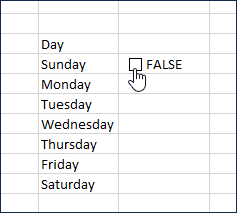
Let’s type Day and Sunday.
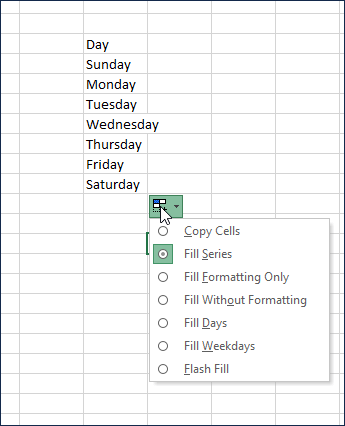
If you select the Sunday cell and drag it down to 6 more cells, Excel will automatically populate the other weekdays.
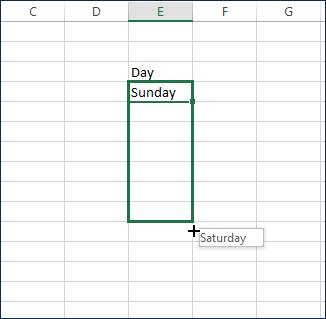
Excel fills the series for us to help with data entry, as it knows the common series such as days of week, months in a year, etc.
Check Box does not work in Excel Online yet. So, if you plan to use your file online to edit in your browser, then please do not use this technique. Instead you can use the drop-down list technique.
1. Enable Developer Ribbon
Click on File –> Options.
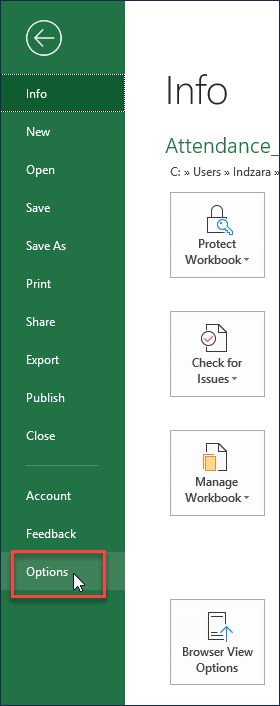
Select Customize Ribbon on the left sidebar and then check the box next to ‘Developer’ on the right side.
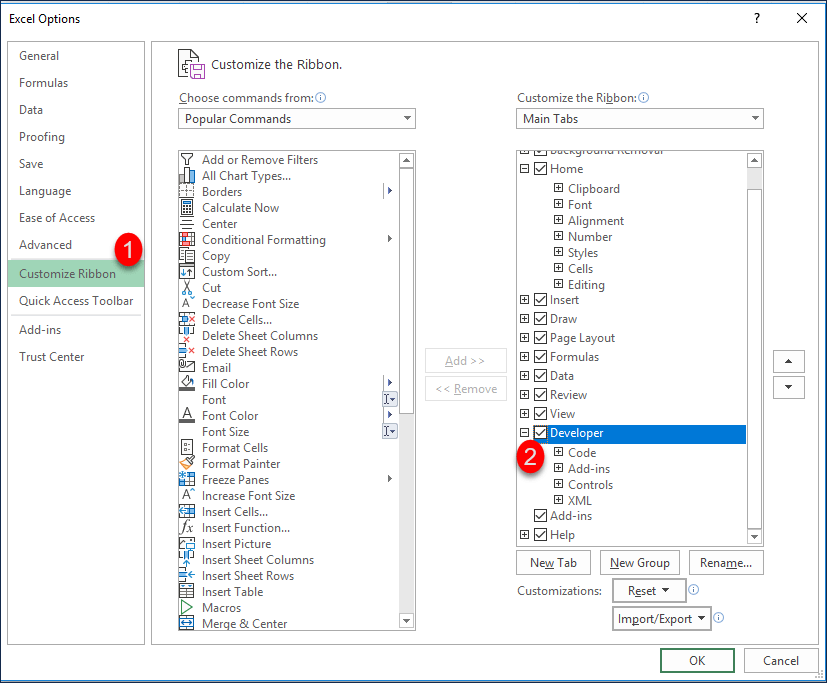
Press OK.
Now Developer ribbon appears.

2. Insert Check Box control
Insert Check Box control.
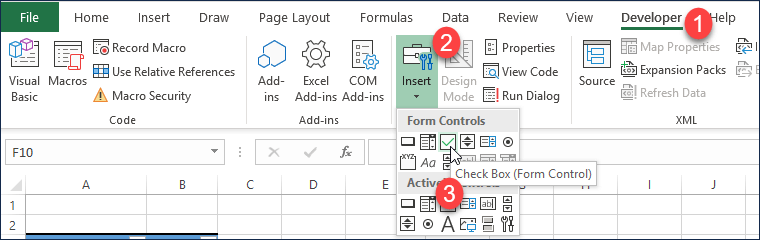
Then, click where you want the box to be and drag to create the check box.
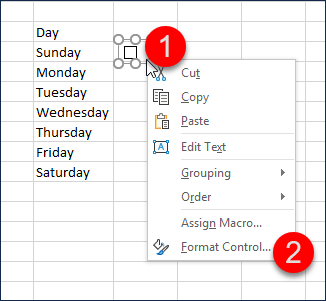
Right click on the check box and then select Edit Text.
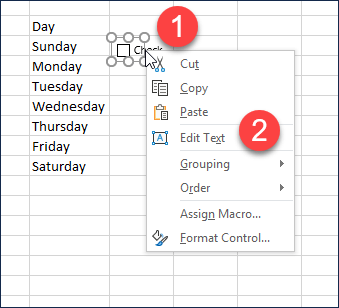
Remove the default text in the box. This is usually difficult to format. We will not need that text as we will use the text that we typed already in the previous column.
3. Link Check Box to a cell
Right Click and select Format Control.
Now, we want to establish the link from the Check Box control to a cell.
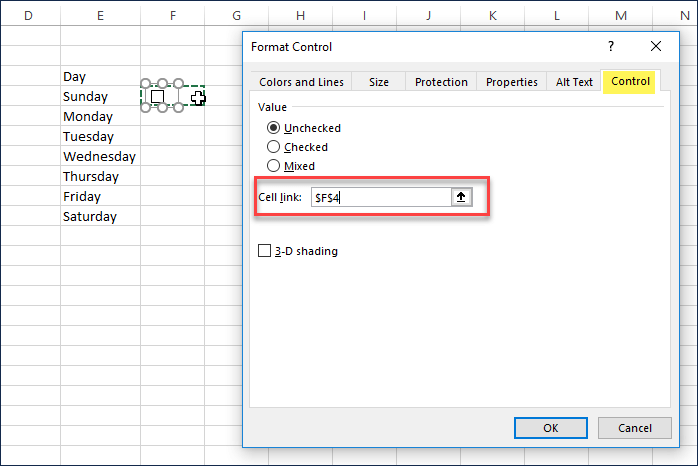
In the Control tab, select cell $F$4 as Cell link.
Now that we have created the link, when you click on the check box to select, the cell F4 will display TRUE.
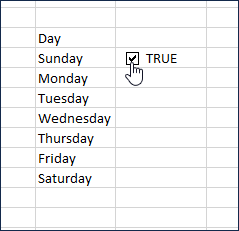
If you click on the box again to uncheck or deselect, then the text display in cell F4 says FALSE.
This is how we can let the Check Box control change the value. If it is checked, Sunday is a weekend, if it is not checked, it is a working day.
4. Copying Check Boxes
Now, we need to create this for other 6 days.
- Select cell F4 and press Ctrl+C to copy.
- Now, select cells F5 to F10.
- Press Ctrl+V to Paste
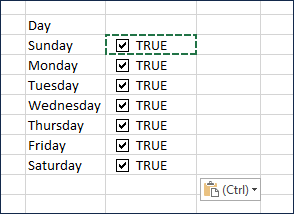
All the new checkboxes will also be pointing to the same cell F4.
We must change each of them to point to a different day (checkbox next to Monday should point to cell F5 (Monday).)

After changing all the check boxes, we will change the font color to white.

This is done only for cosmetic purposes. Check box itself visually shows selected or not. So, we don’t need the display of TRUE or FALSE as well. Though the value is necessary for calculations, we don’t need it visible.
We will have the following appearance which is much cleaner.