Read along for the step by step guide to create a Employee Leave Manager Dashboard. Kindly take note that it might take a few seconds to load the dashboards after data entry.
Overview of Steps
- ENTER ONE-TIME SETTINGS
- Enter Leave Types (up to 12)
- Choose Weekend
- Enter Holidays
- Enter Reporting Period
- Enter Entitlement Settings
- ENTER DATA
- Enter Employees Data
- Enter Leave Entries
- VIEW AUTOMATED REPORTS & DASHBOARD
- Team Balance Report
- Daily Report
- Employee Report
- Monthly Team Dashboard
Enter the One Time settings:
Leave Types: Enter Leave Types in the LEAVE TYPES table.

You can enter up to 12 leave types. You can name the leave types as you need for your organization.
Colors are shown as they will be used in the Reports and Dashboards.
Colors are automatically assigned and cannot be modified.
Choose No for BALANCE TRACKING if you would like the specific leave type to be not tracked in Balance Reports. Examples would be Offsite meetings and training that the employee has to attend but should not be counted as leave against the allowed leave. The employee is unavailable for normal work but is still working for the company in offsite events or training sessions.
Leave the field blank if you would like to track in Balance reports.
Weekends:
The template can support customized weekends. You can choose the days of the week that your company considers as weekends. Just select TRUE for those days.

When calculating the workdays, the template will exclude weekends.
If an employee is taking leave from one Monday to the next Monday (assuming Sat and Sun are weekends), it will count as 6 leave days and not 8. Sat and Sun will not be counted as leave days against the leave allowed for the employee.
Holidays:
The template can support customized holidays. You can choose the days of the week that your company considers as company holidays. Just enter the date and name of the holiday.

You can enter as many holidays as needed. When you continue using template for next year, you can just keep adding holidays for next year.
When calculating the workdays, the template will exclude holidays.
If an employee is taking leave from one Monday to Wednesday (assuming Tue is a holiday) it will count as 2 leave days and not 3. Tue will not be counted as leave day against the leave allowed for the employee.
Reporting Period: The reporting period is the range of dates that are used to calculate the leave balance of employees. Just enter the Start and End Dates for your company’s reporting period.

In the above image, we have set up the reporting period to be from Jan 1, 2019 to Dec 31, 2019.
The max reporting period allowed is 12 months. If you enter a date range that is more than 12 months you will see an error message.

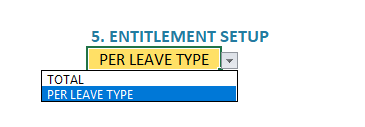
Entitlement Setup:
The template provides two options for entitlement (or quota) setup. You can set the entitlement at the total level or per leave type.

If you choose TOTAL, you can then enter the total entitlement of leave days.

In the above example, we have chosen 15 days as total allowed leave for all employees.
If you choose PER LEAVE TYPE, you can then enter the entitled leave days for each leave type.


The leave types that we set to NO for Balance Tracking earlier, do not need any Entitled leave and can be set to 0. In the above example, each employee is allowed 8 days of Vacation, 5 days of Sick, 2 days of Medical and so on.
Enter Data
There are two data inputs you would have to enter. 1) Employees 2) Leave Entries
Enter Employee Data: In the EMPLOYEES sheet, you can enter list of employees in your organization.

Employee Name and Start Date are Required Fields. End Date should be used if the employee has left the company.
Employee Name should be unique. Do not repeat the same employee name twice in this table.
Other columns in blue fill can be customized as needed. You can rename the columns and use to store any information you want to store about the employees.
Enter Leave Entries: In the LEAVE sheet, you can enter list of leave entries for all employees in your organization.

For each leave entry, enter the Employee Name, Start of leave, End of leave, Leave Type and Daily Leave Value.
If an employee is taking a single day leave, enter the END DATE same as START DATE. Do not leave the END DATE blank or empty.
DAILY LEAVE VALUE can be partial days as well. 0.5 would represent half a day.
If an employee is taking multiple day leave, for example, from Aug 5, 2019 to Aug 8, 2019 and Daily Leave Value is 0.5, that would mean 4 days of 0.5 each, resulting in 2 whole days of leave taken. Do not enter the total leave value in the DAILY LEAVE VALUE field.
DAILY LEAVE VALUE can be entered as negative value if an employee is working on a holiday or a weekend. Let’s call it a ‘Make up Day’. The template can support such scenarios.
Validations
There are some validations put in place to highlight data entry errors in different colors.

- If you are entering negative leave value (make up day) it needs to be for a holiday or a weekend.
- Leave Start Date cannot be after the Employee has left the company.
- Leave Start Date cannot be before the Employee has joined the company.
- Leave End Date cannot be before Leave Start Date.
Any leave Entries with these errors will be excluded from reporting.
Custom Columns
Just like in Employees table , we can add custom columns to the Leave table.

That completes our data input for the template. You are now ready to view the automated output from the template.
View Automated Reports & Dashboards
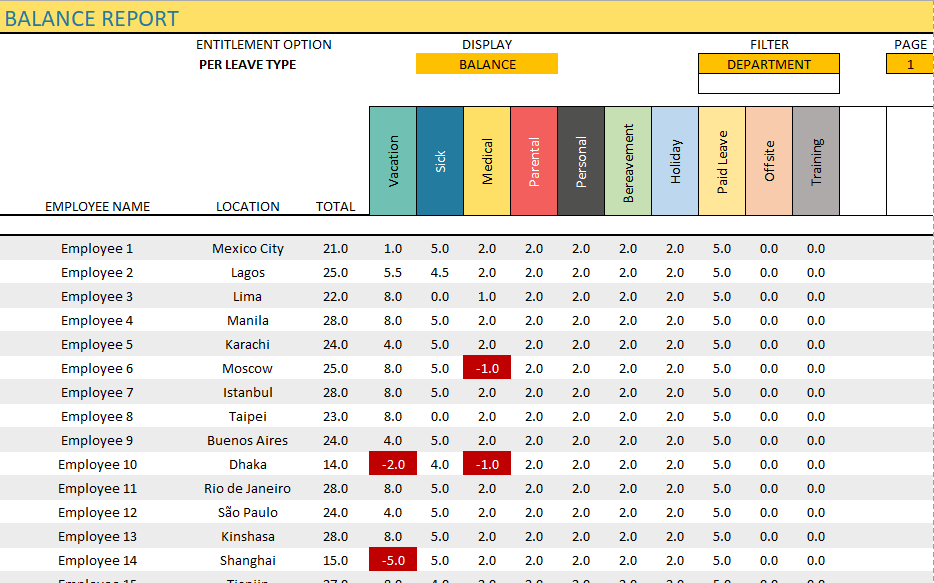
Balance Report
Balance report lists the employees along with their leave balance information at total as well as each leave type.

There are 3 controls available in the Balance report to customize it.
- Display
- You can choose to display one of three measures on the report.
- Entitled: Number of days of leave entitled; Used: Number of days of leave used ; Balance: Number of days of leave available as balance
- Filter
- You can choose a Filter field from the drop down. The list of fields in Employees table are available for you to filter by, including any custom columns you created.
- You can then enter a Filter value. For example, if Filter field was ‘Department’ and filter value was ‘Finance’, the report will display only employees in Finance Department
- Please note that any employee who is not employed during the reporting period will automatically not be displayed in this report.
- Page #
- The report shows 100 employees at a time. You can enter 2 as Page number to see employees 101 to 200.
Negative balances will be shown in red fill.
Daily Report
Daily report lists all the leave entries for a specific date.
Here, you can type in any date and the report will pull the leave entries for that specific date.
The report also summarize the total leave by leave type on the left.
The last column on display is a custom column where you can replace it with any column from Leave table.
Employee Report
Employee report is a printable report that will display the summary and details of leave and balance for a specific employee.
This report has two pages. Page 1 displays the summary by leave type for the entire reporting period at the top and a calendar view in the bottom showing leave information.
Page 2 shows the totals for each employee by leave type. It also displays the overall total leave and worked days.

There are 3 controls available in the Team Dashboard to customize it.
- Custom Column
- As the second column next to Employee Name, you can choose any column from Employees table. In the above example, we have chosen Department.
- Filter
- You can choose a Filter field from the drop down. The list of fields in Employees table are available for you to filter by, including any custom columns you created.
- You can then enter a Filter value. For example, if Filter field was ‘Department’ and filter value was ‘Finance’, the report will display only employees in Finance Department
- Please note that any employee who is not employed during the Month chosen will automatically not be displayed in this report.
- Page #
- The report shows 100 employees at a time. You can enter 2 as Page number to see employees 101 to 200.